http://www.2besatisfied.com/
Monday, February 14, 2011
Food inspiration-"Satisfied"
I miss warm weather. Most of all, I miss warm weather food. I was looking through one of my favorite cooking blogs, Chef Louise Mellor's "Satisfied." Her pictures always amaze and inspire me..and make me very hungry. This tomato tart is so gorgeous. Doesn't it make you just crave the summer flavors?
Monday, February 7, 2011
Balsamic glazed bacon brussels sprouts
I was having dinner at Bocado (http://www.bocadoatlanta.com) last weekend with my friend Andrea. She ordered the brussel sprouts and was meticulously picking around the chunks of luscious bacon. She claims she doesn't like bacon. Philistine. I mean, to each his own. :)
Regardless, I am straying from the point. What I am trying to get at here is she asked me about how to make brussels sprouts. She said she loves them, but has no idea how to make them. I tried explaining it in my own words, but she had that "deer in the headlights" look. It occurred to me that a lot of people overlook these little guys because they don't know how to work with them. No fear friends, I am here to make you a brussels sprouts convert.
Balsamic glazed bacon brussels sprouts
1 (16 oz) bag of brussels sprouts
salt and pepper to taste
2 tablespoons oil of your choice*
1/2 cup chicken stock
1 teaspoon dijon mustard
1 tablespoon apple cider vinegar
1 small shallot, small dice
1 tablespoon good, aged balsamic vinegar
2 pieces bacon, diced* for topping
**Cooks note-I have tried this recipe with all kinds of fat/oil. I have tried olive oil, coconut oil, and...GASP... bacon fat. They are all delicious, but the bacon fat is the best (of course!) And, sigh, if you don't like bacon, leave it out. But don't.
To begin, take your brussels and chop off the woody part on the end. Chop them in half. Chop your shallot and put it in a cup with your chicken stock, dijon, and apple cider vinegar. Whisk together.
Even puppies like sprouts!
Preheat a large skillet to medium-high. Add your 2 tablespoons of cooking oil. When the oil is hot, (you will see it spread out and ripple a little) add your sprouts cut side down. Watch your fingers! Add salt and pepper to taste. The key to this recipe is to have all of the sprouts cut side down so you get a nice brown caramelization. Depending on the size of your pan, you may have to cook them in 2 batches. Cook them for about 4 minutes and then flip one over to check the color. You want them to have a nice browned color. Some will get more color than others. Don't stress about it.
Once they are browned, add the chicken stock mixture and stir around. (If you are cooking in 2 batches add half of the mixture, reserve half for the second batch.) Put the lid on the pan and let them steam for about 5 minutes, until they are crisp tender. Taste one for seasoning and see if it is done before removing from the heat.
Glaze with one tablespoon good balsamic vinegar. I use this 25 year old vinegar from Williams Sonoma. It is so delicious, I really could just drink it from the bottle! Use whatever brand you like. Look for one that is aged for a few years. The sweetness from the aged vinegar cuts through the saltiness and adds a beautiful glaze.
Arrange them on a pretty plate and top with the chopped bacon.
BACCCCCOOOONNN!
Monday, January 24, 2011
Smashed Sweet Potato Hash with Chicken Sausage
Hi friends!
I will admit, I am resistant to change when it comes to my breakfast. Typically when I find something I like, I will stick with it for months, even years! Lately it has been eggs scrambled with lots of veggies and one piece of ridiculously good bacon from the farmer's market. I love to linger over my laptop, slowly drinking my coffee and catching up on the world with my breakfast in hand. I visited my mom in Florida this weekend, a complete breakfast minimalist. No veggies!? No coffee!? I was forced to make due with what I had. I ended up frying some eggs sunny side up and dipping the bacon in the yummy yolk. I forgot how satisfying that sensation can be! To top it all off, I was missing my fur children. Appolonia was spayed last week and has been trotting around in the "cone of humiliation." You never realize how much your dog moves around until she is running into everything in sight!
Poor bear!
During my breakfast dilemma, I remembered getting a breakfast hash at a really good restaurant near my gym, Urban Pl8. If you have never been, you need to give it a try. Their focus is on fresh, local food that people can afford. Check it out at http://www.urbanpl8.com/.
Smashed Sweet Potato Hash with Chicken Sausage
One large sweet potato
2 tablespoons olive oil
1/2 medium onion
1/2 jalapeno, seeds and core removed
6 oz. (2 links) chicken sausage, precooked
Salt and pepper to taste
1 teaspoon cumin
1 clove garlic
4 eggs
Toppings: (optional) chopped chives, scallions, avocado, fresh salsa
Serves 2-3
Preheat a heavy bottomed skillet over medium heat. Preheat your oven broiler. Chop vegetables and sausage into small cubes. Try to make all your vegetables relatively the same size so they finish cooking at the same time. I removed the inner membrane and seeds of my jalapeno. If you want more heat, leave them intact. The dish was hot to me without them, but I am a pretty big wuss when it comes to spicy food!
Place olive oil into preheated skillet. If the oil ripples and spreads out easily over the pan, you are good to go. If it smokes, take the pan off the heat for about 30 seconds and let it cool down a little bit. You want the pan to be hot, but not so hot that you burn the vegetables.
Place the veggies, garlic and sausage into the pan. Season with salt, pepper, and the cumin. If you have never cooked with cumin before, give it a try! It is that delicious, smoky flavor that is in the background of chili. Toss everything around in the olive oil until it is well coated. Now, for the surprise. We smash! Place something heavy over your hash to increase the contact with the pan. I recommend a smaller sized skillet. Let the hash cook for about 5 minutes, pressing down on the skillet occasionally. (use an oven mit!) After 5 minutes, toss the hash around and cook for an additional 3 minutes.
Remove your "smashing"pan. Add your eggs and season them with salt and pepper. Let the eggs cook on the stovetop until the outer white portion is just set. The inner white takes longer and will be cooked in the broiler. After the outer white has set, place the hash under your preheated broiler and cook until the entire white is cooked through, but the yolk is still runny.
Garnish with anything you like. I used avocado slices and freshly chopped chives. The avocado adds a really beautiful buttery texture to the dish. Serve with freshly toasted bread for dipping in those yolks!
Get out of that breakfast rut! Enjoy!
Monday, December 20, 2010
Christmas side dish: roasted beet salad with goat cheese
The beet: a highly underrated vegetable. I have always loved them, even as a kid. My mom used to serve them to me steamed with a simple vinaigrette on top. I would eat the whole bowl! This is amusing to me considering what a picky eater I was.
This recipe was actually inspired by a visit to one of my favorite restaurants, Kevin Rathbun steak. They have a beet salad with mounds of creamy goat cheese that reminds me of puffy clouds. Served with caramelized pecans, it's amazing.
I must admit, by the end of the holiday season I am over the cooking and the indulgence. I crave something light and fresh that is easy to put together. This beet salad fulfills all those requirements. The quicker I am done cooking, the quicker I can get back to looking like this:
There are no exact measurements to this recipe so feel free to throw in as much or as little of the side players as you want. It all depends on how many beets you are using. Just make sure each layer is seasoned well.
Roasted beet salad with goat cheese
mix of red and yellow beets, peeled and chopped into bite size pieces (you can use all red beets, I used both for color)
extra virgin olive oil
salt and pepper to taste
chopped red onion, small dice
roasted pecans or nut of your choice, roughly chopped
good parmesan cheese
goat cheese
fresh basil
Salad dressing
1 part acid (balsamic vinegar)
2 parts extra virgin olive oil
salt and pepper to taste
(for example, if you want to make 3/4 cup of dressing, use 1/4 cup vinegar and 1/2 cup oil)
Un-peeled beets: the forgotten root veggie
Start by preheating your oven to 375 degrees. Take your beets and cut off the rough bottom. Peel them well until the surface is smooth.
You may want to wear gloves for the chopping and place a piece of foil over your cutting board because beets can stain. If not, that's fine. The stains will come out with a good scrub.
Beet hands!
Chop your beets into bite size pieces. I chose to chop mine into different sizes for a visual appeal. Keep in mind if you do this that the pieces will finish cooking at different times. Place the chopped beets onto a sheet pan, drizzle with a good drink of extra virgin olive oil, salt and pepper. Toss together. Roast until a knife inserts easily and they are caramelized and delicious. You will need to flip them once or twice to make sure all the pieces brown evenly (this took me about 35 minutes.) Check for seasoning and let cool before adding the other ingredients. While waiting, have a glass of wine and make the dressing. Pour the vinegar into a measuring cup and whisk in the oil slowly until an emulsion is created. Add salt and pepper to taste.
Once cooled, begin assembling the salad. Add the chopped basil, parmesan (I used a peeler to create parmesan curls), red onion, and the dressing (enough to lightly coat the beets.) If you are serving immediately, you can add the pecans. If not, wait to add these until you serve the salad so they retain their crunch factor. Toss all the ingredients together. Pour onto your serving platter and add chunks of goat cheese on top. More is better here! To garnish, add a little more chopped basil and parmesan curls on top.
Next time you are sick of the same old side dishes, spice it up and give this a try. I hope you enjoy it as much as Dan and I do. Merry Christmas!
Sunday, November 28, 2010
I am thankful for: pumpkin spice cake with pumpkin bourbon ice cream
I apologize for the delay in blogging, life has been busy! With Thanksgiving and my finals coming up, things have gotten a little behind. Nonetheless, I managed to squeak one new creation in, my pumpkin spice cake that I brought in to work for the Thanksgiving feast. This is a pretty technically difficult cake because of all the steps it requires. With a little effort though, you will end up with a visually stunning dessert that tastes like Thanksgiving goodness on a plate.
My pumpkin with the pumpkin
Pumpkin spice cake with pumpkin bourbon ice cream
Topping
1 cup granulated sugar
1 teaspoon pure vanilla extract
1 cup roasted nuts of your desire
sea salt
parchment paper for preparation
Cake
1 and 1/2 cups pumpkin puree
3/4 cup unsalted butter
2 cups unbleached all purpose flour
1 and 1/2 teaspoon baking soda
3/4 teaspoon salt
1 and 1/2 cups granulated sugar
2/3 cup packed dark brown sugar
2 large eggs
1/3 cup buttermilk
2 teaspoons ground ginger
1 and 1/2 teaspoon ground cinnamon
1/2 teaspoon cardamom
1/4 teaspoon nutmeg
Frosting
1 package softened, light cream cheese*
1/2 cup softened unsalted butter*
1/4 cup packed dark brown sugar
1 cup confectioners sugar
1 teaspoon pure vanilla extract
1/2 teaspoon ground cinnamon
*completely softened, I leave mine out for a few hours (atleast 4)
Ice cream
http://www.bunkycooks.com/2010/11/pumpkin-ice-cream/
Recommended bourbon: maker's mark
I started this cake by making the topping. It is roasted nuts (whatever you have in the house), topped with a caramel and some sea salt.
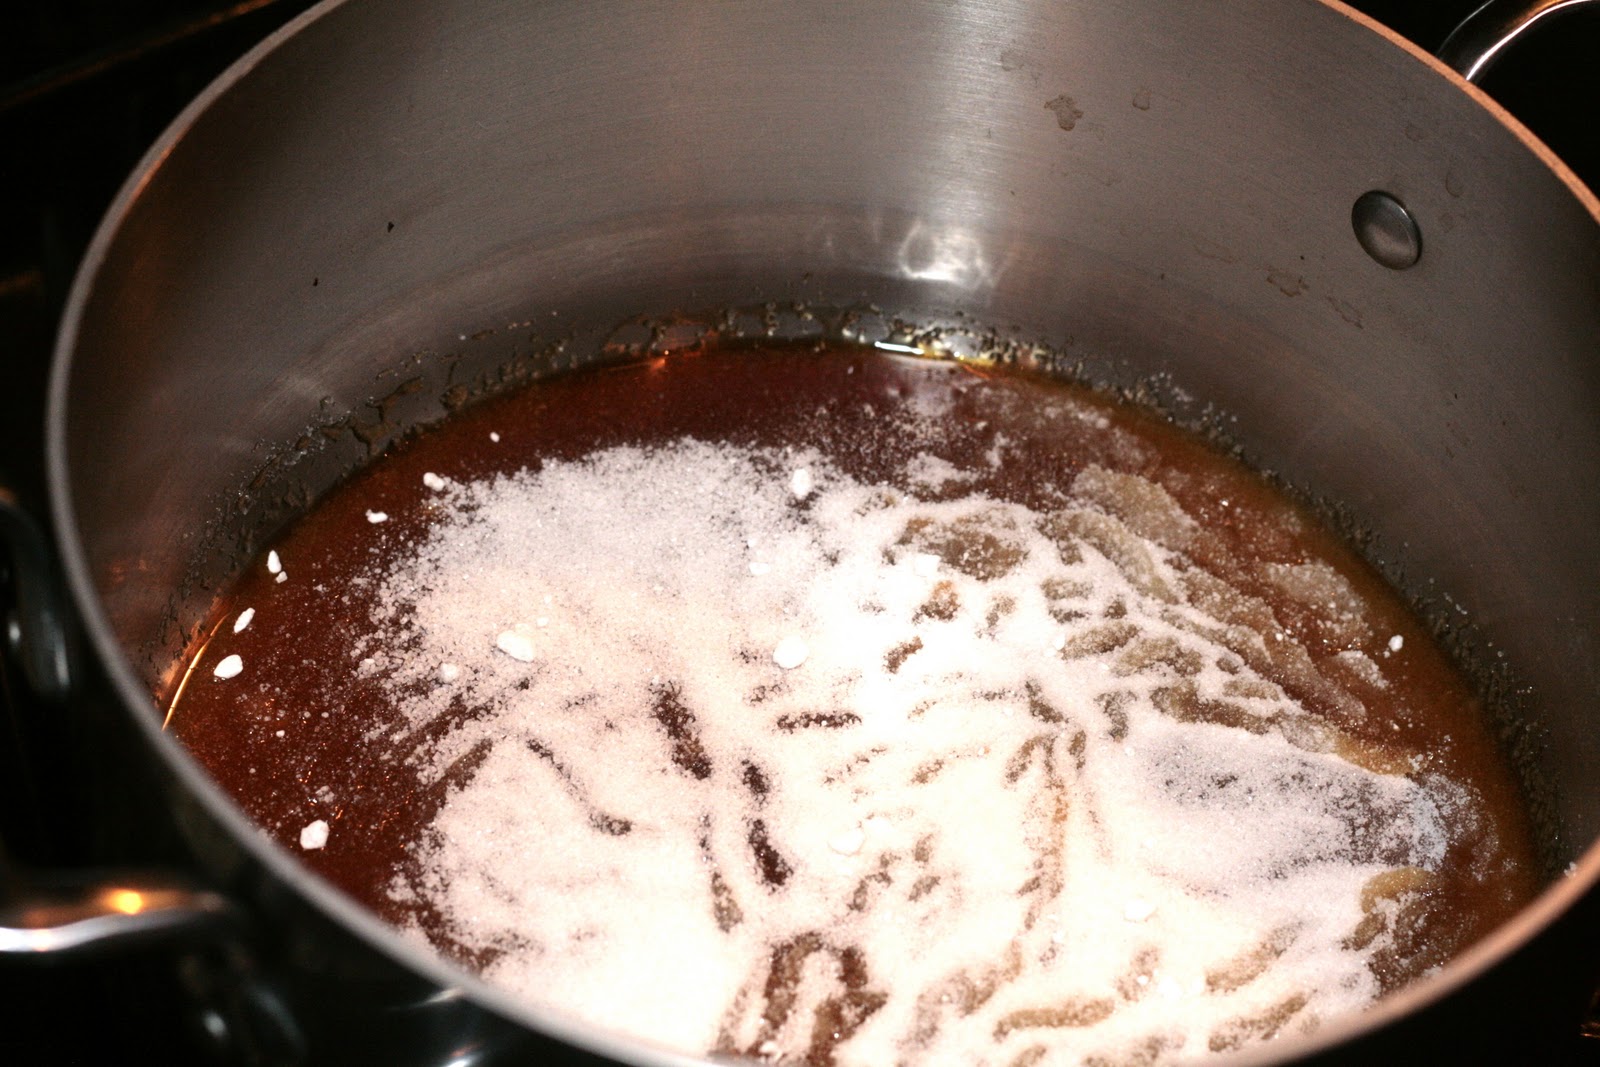
Take one cup of granulated sugar and melt it slowly in a pan over low-medium heat. Watch it carefully! There is nothing worse than spending all that time developing a beautiful caramel only to have it scorch. Don't stir it with a utensil. Your utensil will end up a clumpy mess and it will cause lumps in the caramel. All you need to do is swirl it every 2-3 minutes to get the sugar melting.
Watch it carefully. That brown amber color along the edges is what you want
Take one teaspoon of pure vanilla extract and pour it into the caramel. It will hiss and sound very angry. That's ok, this is normal! :) Take your roasted nuts of choice and place them on a piece of parchment paper so they don't stick. Pour your lovely caramel all over them. Sprinkle a little sea salt on top to give flavor and contrast. That's it, let it hang out and harden while you prepare the rest of the cake.
To start the cake, begin with making the brown butter. I know it sounds intimidating, but it really is easy. Basically all you are doing is toasting the milk solids in the butter. It creates a really delicious nutty complexity to the butter. Take your 3/4 cup butter and place it in a sauce pan over medium low heat to let it melt. Check on it every 2-3 minutes and swirl it around.
Butter starting to brown
This took me around 8-10 minutes. You are looking for a nutty golden brown color. Once you have the color you want, take it off the heat and set aside in a bowl.
Finished brown butter
Thoroughly butter and flour two nine inch round cake pans and preheat the oven to 350 degrees.
Measure out your dry ingredients. Make sure you are using dry measuring cups for the dry ingredients and wet ones for the wet ingredients. I measure by "fluffing up" the flour, then leveling off with a knife.
Put the flour, baking soda, salt and spices into a sifter to get rid of any lumps.
Place the pumpkin puree, granulated sugar, brown sugar, eggs, brown butter and buttermilk into a separate large bowl and whisk until well combined. Now we bring the wet and dry together!
Incorporate the wet into the dry in three batches. (1/3 of the dry mix into the wet, stir just to combine, repeat times two) You don't want to overwork the batter and develop the glutens in the flour. Just mix until all the ingredients are combined. Pour the batter evenly into your two pans. Bake until a toothpick in the center comes out clean (About 25-28 minutes.)
Your cakes will come out like this:
Let cool in the pan for about 10 minutes. Transfer to a wire rack and let cool completely while you make the frosting. The most important thing about the frosting is to use completely room temperature ingredients so you don't end up with lumps in your frosting. I use my stand mixer, but you could certainly use a bowl and a whisk. Place all ingredients into a stand mixer or bowl and beat until light in color and the sugar has dissolved. Start out slow so you don't get confectioners sugar all over you!
Once the cake has completely cooled, you can frost it. I wanted mine to look very rustic. You could do it with cleaner lines as well. I chopped up the nut/caramel topping and scattered it on top. So beautiful!
To make the ice cream, all you need is a few simple ingredients and an ice cream maker. If you don't have one, ask for one for Christmas. It is so fun to make your own unique flavors of ice cream. Or just go to Morelli's gourmet ice cream and pick up some of their amazing ice cream to go. http://www.morellisicecream.com/
Enjoy!
Sunday, November 14, 2010
Cinnamon vanilla pecan butter (with a guest bear!)
Such an exciting weekend! We are dog sitting for some friends. This is the future father of Appolonia's unborn pups:
George, Dan's new BFF
Isn't he precious?! I have such a sweet spot for animals.
I heart big dogs
I was in a cooking kind of mood this weekend. I made a recipe with some heirloom carrots, but I wanted to share this one with you first because it is one of my five food groups. (bacon, eggs, fruit, veggies and NUT BUTTERS!) This recipe stemmed from my obsession with peanut butter. Before this recipe, I used to eat about a jar every 2 weeks!
I was on a normal trip to the DeKalb County farmers market. They sell all kinds of gorgeous nuts in bulk (almonds, pistachios, brazil nuts, pine nuts, and pecans.) I started thinking about what I could do with the mass of pecans I bought. Cinnamon vanilla pecan butter was born! This recipe is so easy and requires very few ingredients.
Roasted deliciousness!
Cinnamon vanilla pecan butter
One lb pecans (halves or pieces)
1/8 teaspoon salt
1/2 teaspoon cinnamon
1/2 teaspoon good vanilla
5 packs of truvia or 1 tablespoon honey, sugar or Splenda* see cooks note
Almond or walnut oil* see cooks note
Tips:
*Choose pure vanilla extract over imitation vanilla. It makes such a difference!
*I used truvia in this recipe. If you aren't familiar with it, you should look into it. It is a natural no calorie sweetener made from the Stevia plant. (Check it out at http://www.truvia.com/) Feel free to substitute for any sweetener that you prefer.
*As far as the oil goes, I didn't include an amount because it varies for how thick or thin you like your nut butter. I used 2 and 1/2 tablespoons for my recipe. Add the oil in slowly until you get the consistency you like. There are some really delicious nut oils out there. You can buy them at the farmer's market, whole foods, or in the organic section of any nice grocery store. Use whatever sounds good to you. Just don't use olive oil!
Preheat the oven to 375 degrees. I roast the pecans first to develop the flavor. Put your pecan pieces on a cookie sheet pan and roast them for 6-8 minutes. Keep checking them because they can burn easily. When you can smell them, they are done. Let them cool down for a few minutes. Once cool, put them in a food processor and add the salt, vanilla, cinnamon, and the sweetener of your choice.
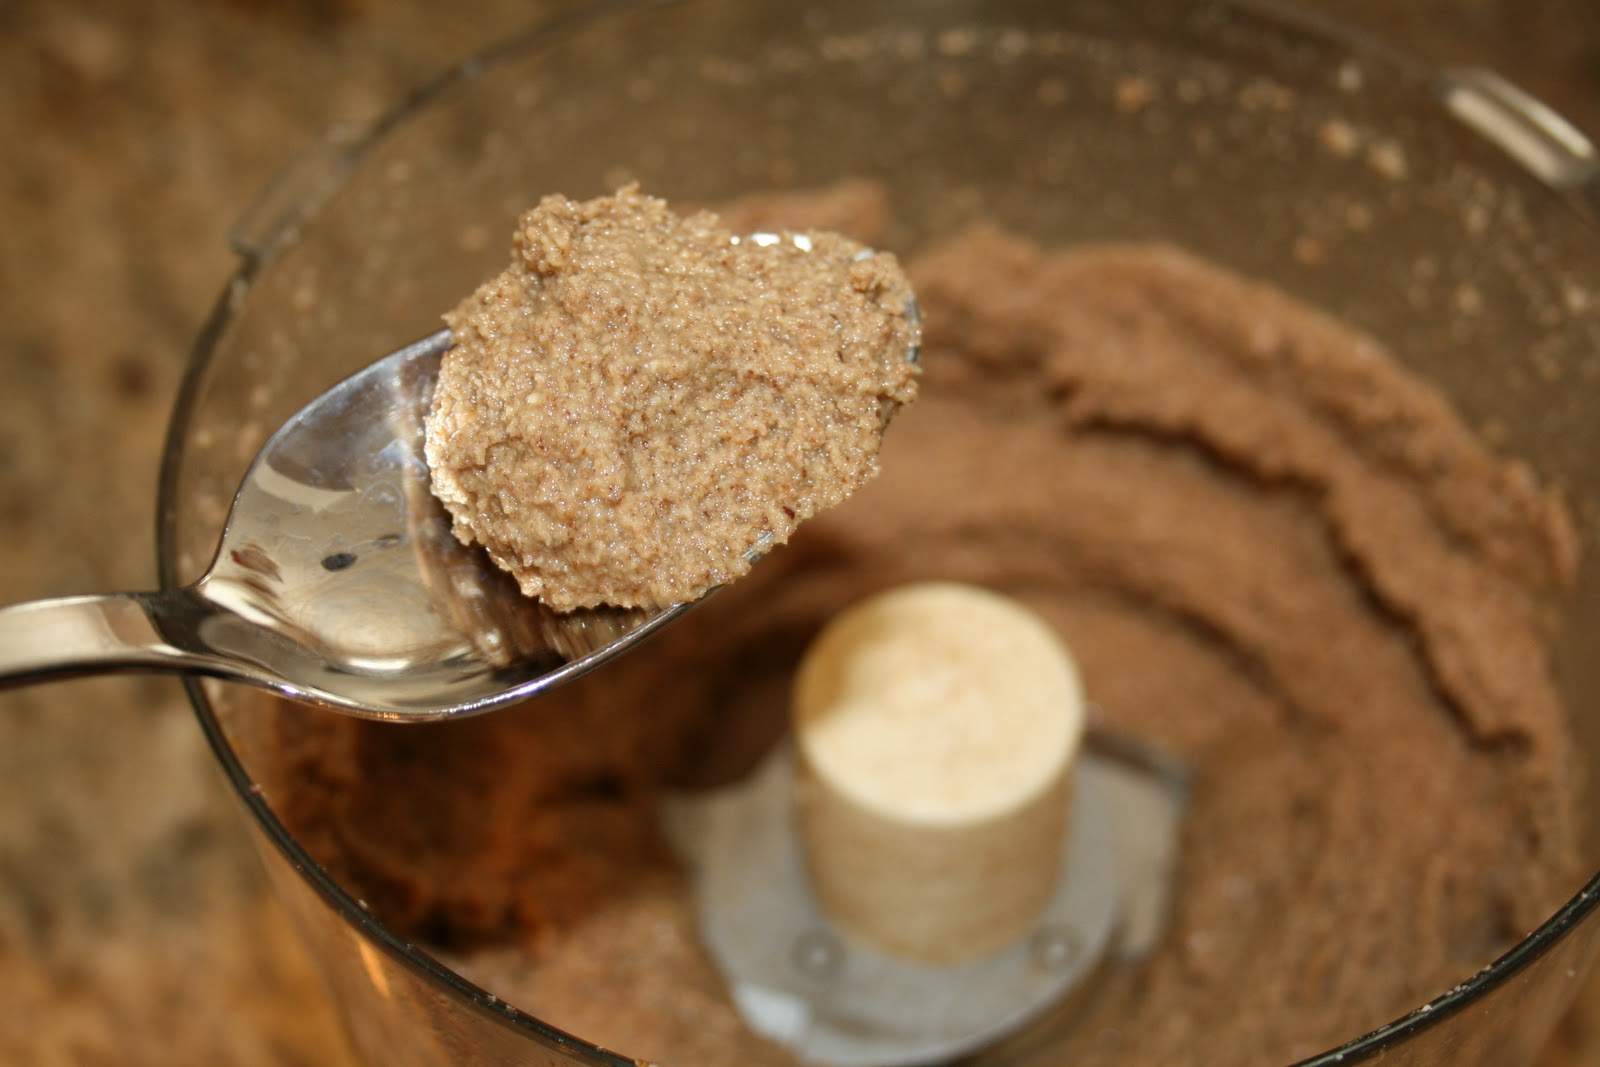
Pulse a few times to incorporate the ingredients. Your mixture should look something like this:
Put the top on the food processor and turn it on. Using the opening on the top of your food processor, slowly add the oil in a thin stream. I would recommend adding about 1/2 teaspoon at a time and then checking the consistency. You can always add more oil. It is difficult to fix a runny nut butter! At the end of the process you should have something that looks kind of like this:
Hopefully your family's reaction will be similar to this:
Pecan delirium
This makes about 2 cups. Enjoy!
Sunday, November 7, 2010
First recipe! (oh my)
I thought long and hard about what recipe I wanted to share with you guys first. I consulted the experts and we discussed the possibilities in detail.
I decided to go with my classic red tomato sauce. I know what you are thinking: "Why the hell would you make your own tomato sauce??" Yes, you can buy a good tomato sauce in the grocery store. But it won't be as good as this. Also, when you make your own you can guarantee the quality and freshness of ingredients. Who needs the preservatives and artificial chemicals included in canned tomato sauce? Take the time, your efforts will be rewarded.
This was a good opportunity for me to use my basil plant before the cold weather takes it out!
Hints:
1.) Start out with good ingredients. Your food will only be as good as the ingredients you choose.
2.) Fresh herbs are a secret power house of flavor. I have rosemary and basil growing in my front yard. Considering I have two black thumbs, if I can grow them, you can too. Any leftover herbs that I have, I chop up and freeze. Thyme is especially good for this because the tiny leaves fall off when frozen and go to the bottom of the container.
3.) Don't be afraid to taste and reseason throughout the process. Salt is your friend.
4.) You can use fresh tomatoes when they are in season. This recipe uses canned organic tomatoes. Use whatever tastes better.
Basic Tomato Sauce
1/2 cup extra virgin olive oil
2 medium onions, chopped
1 and 1/2 teaspoons salt
3/4 teaspoon freshly cracked black pepper
2 celery stalks, chopped
2 medium carrots, chopped
4 cloves of garlic, finely diced
2 dried bay leaves
1/4 teaspoon red pepper flakes* optional
1 teaspoon finely chopped fresh rosemary
1 teaspoon fresh thyme
(2) 28 oz cans whole peeled tomatoes or tomato puree (recommended brand: Muir Glen)
1 tablespoon tomato paste
1/4 cup heavy cream* optional
1/2 cup fresh basil, chopped
I start out by preheating a large pan to medium heat. Add 1/2 cup olive oil (sounds like a lot, but this makes a big batch of sauce.) Chop up 2 medium onions, 2 celery stalks, and 2 medium carrots into a small dice. Throw them into the olive oil with the salt and black pepper and cook until softened, but not browned (7-8 minutes). Add 4 cloves of finely chopped garlic, 2 dried bay leaves, 1/4 teaspoon of red pepper flakes (more if you like your sauce spicy), one teaspoon of chopped fresh rosemary, and one teaspoon fresh thyme. Cook for about one minute. Add the tomato sauce and the tomato paste. Reduce to simmer and cook until it has this consistency (this took me about an hour). Remove the bay leaves!
Now we blend!
Using an immersion blender or a regular blender, pulse down until the vegetables are slightly chunky. Maybe 15-20 seconds with an immersion blender or 5-6 pulses in a standard blender.
Add the basil now. You don't want to add it at the beginning because it will wilt, lose it's green color and a lot of it's flavor. Always add fresh herbs like this at the end. At this point, the sauce is pretty much done. UNLESS...
Red sauce on crack.
I tried to think of how I could improve on this recipe tonight and it dawned on me: "everything is better with heavy cream!" I added 1/4 cup and it changed the profile completely. The sauce has a velvety mouth feel with the cream. Of course, it is optional, but come on. So good!
Dan was licking the bowl clean.
This sauce is great because it is so versatile. Any leftovers you have can be frozen and used for other dishes in the future. I hope you enjoy this sauce as much as I have!
Best,
Stephanie
Subscribe to:
Posts (Atom)