Tuesday, May 17, 2011

Roasted chicken and veggies with herb butter

Chicken. The word brings joy to my heart, disdain to my husband's. Well, maybe not exactly.


I tend to rely on chicken as my "go to" meal. Dan's reaction: "Chicken...again!?"  I think he is just jealous because every time he makes it, it turns out salmonella pink. ;)

There are a million plus chicken recipes, but sometimes you just crave a classic roasted bird, done perfectly with crispy skin and juicy meat. This recipe is just that, paired flavors that don't overwhelm, just compliment the chicken. This recipe has lots of fresh herbs, clarified butter, lemon and roasted veggies nestled underneath. The vegetables get super tender and soak up all the flavors of the herbs and chicken jus. I find myself just standing over this bird in the kitchen, eating chunks with my fingers. It's quite the sight to see. 

For this recipe to be done paleo, you need to clarify the butter. Basically, this just means melting the butter over a low heat and skimming off all of the milk fat. Clarified butter is also known as ghee. You can buy it, but why?  Doing it yourself is so easy, plus it will save you money! Not going paleo? Just use regular butter.

Spring for the fresh herbs for this recipe. Use whatever you need, then freeze the rest in a plastic bag. It will be ready to go when you are.

Roasted chicken and veggies with herb butter
1/2 stick butter-clarified (instructions to follow)
One tablespoon chopped fresh rosemary, plus 2 stalks for cavity
One tablespoon chopped fresh thyme, plus 3-4 stalks for cavity
One 5-6 lb chicken, gizzards removed
Two lemons
Three cloves garlic, chopped
Two medium sized onions,  rough chop
Three celery stalks, rough chop
Three carrots, rough chop
Salt and pepper
Kitchen string

Take your chicken out of the fridge and let it come to room temperature for about 20 minutes or so while you prep the ingredients. Preheat the oven to 425 degrees.

Start by clarifying your butter. Place it in a small saucepan over low heat and let the milk solids come to the top. Skim them off with a spoon. Pour into a small bowl and set aside.

Milk solids at the top, fat at the bottom

Chop your herbs-rosemary, thyme and two cloves of garlic. Add to the clarified butter and stir to combine ingredients. Place the butter in the freezer for a few minutes to harden while you prepare your chicken. Chop your lemon into 6 wedges.  Chop the carrots, onions, and celery into large chunks. Mince your other clove of garlic. Set aside.

Grab your bird and some paper towels.  Dry the chicken well to ensure the skin gets really crispy. Sit it up on it's little rear end in a large dutch oven and season the cavity of the chicken liberally with salt and pepper. Stuff the cavity with the rosemary and thyme stalks, the lemon wedges, and one of your chopped onions.


Now for the bondage:

Tie the little bird's legs together and tuck the wings under so all portions cook equally.


Let's get messy here. Grab your clarified butter out of the freezer, it should have solidified by now. Get your hands underneath the skin of the chicken so you are touching the actual flesh.  Make little pockets and stuff the clarified butter underneath the skin. Rub the butter into the bird like you are giving it a deep tissue massage. These butter pockets melt and baste the chicken while cooking, not to mention the flavor they give the vegetables.  No dry, tasteless bird here!


Once you have given the chicken a proper rubdown, season the outside well with salt and pepper. Place the vegetables and minced garlic clove around the chicken. Sprinkle the veggies with salt and pepper too. Remember, you have to season each layer to reach full flavor potential. 


Roast at 425 degrees for an hour and a half, or until the juices run clear when you cut between the leg and the thigh. I like to toss the veggies around about every 30 minutes to ensure equal browning. Let the chicken rest for 20 minutes before slicing. Don't forget to remove the string! :) Garnish with more fresh herbs and lemon slices.
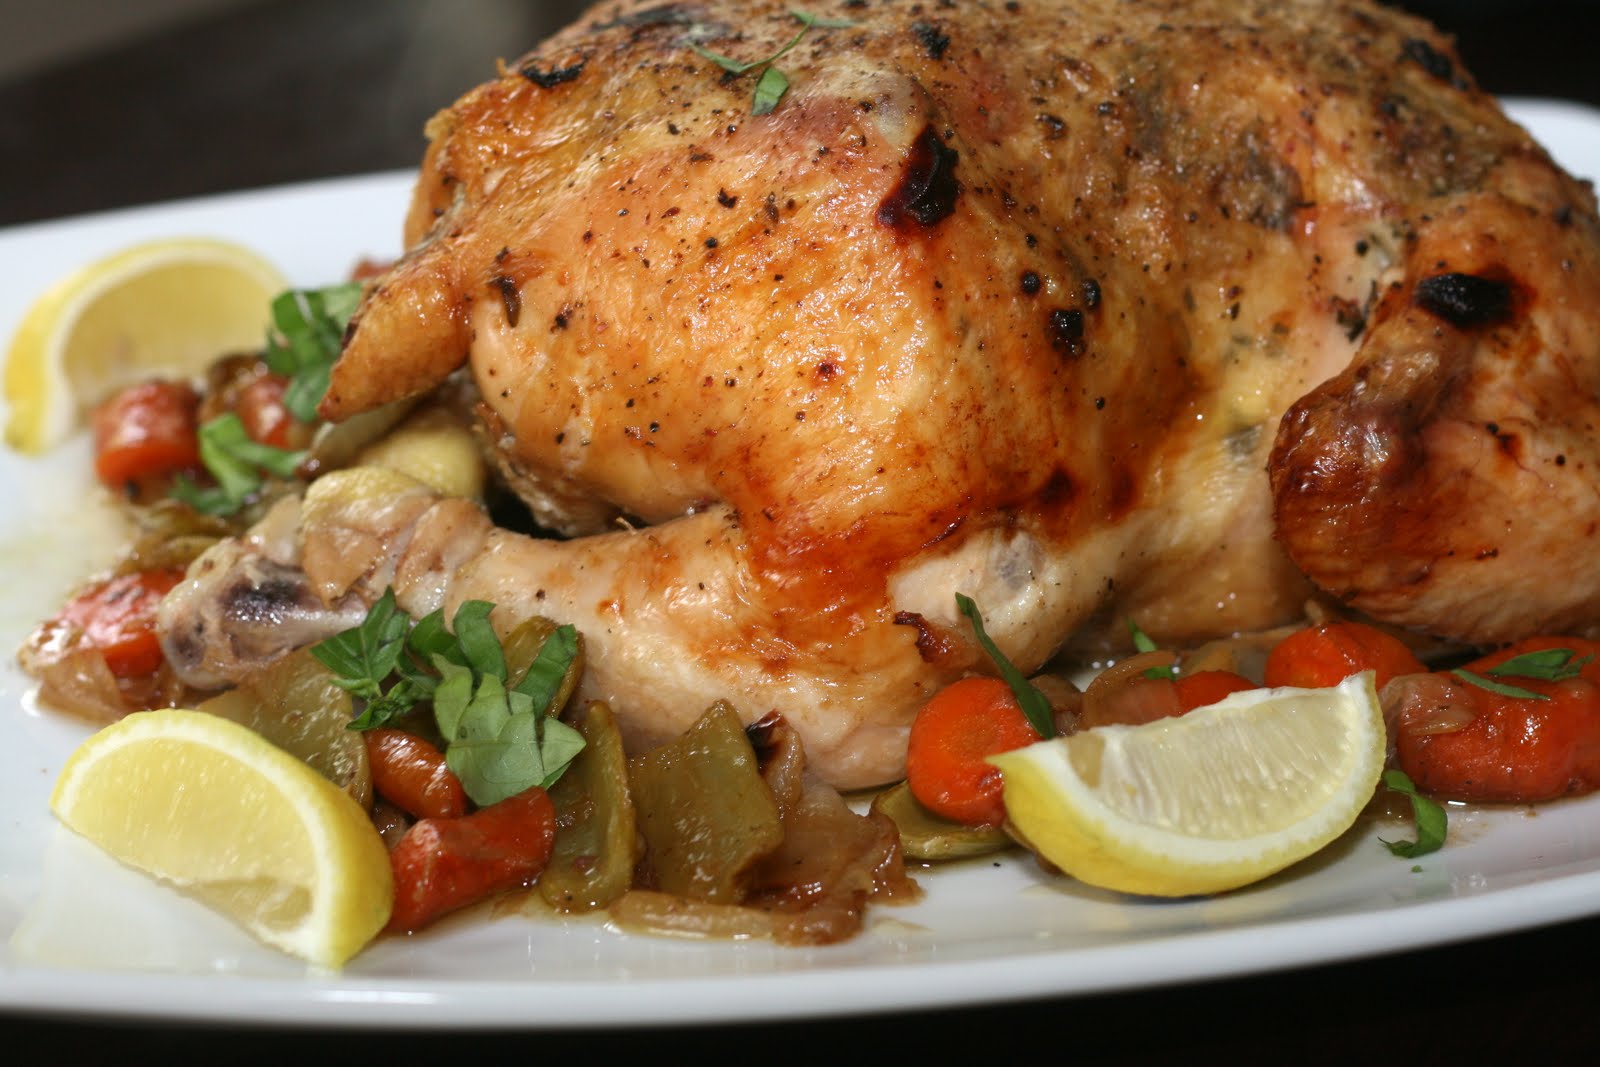

Try to be a better person than me. Enjoy with utensils.


Wednesday, May 11, 2011

Paleo green thai pork curry with "rice"

I must admit, I used to be very weary of Thai food.  Maybe because I'm not a big rice fan.  It seemed like I always ate a ton of it, and then ended up hungry an an hour or so later. Then I discovered this little known Thai restaurant off of Roswell road, Bangkok Thyme. http://bangkokthyme.com/ Ever since then, I have been hooked. The food seems so balanced, a perfect combination of savory and sweet. Since going Paleo, I miss this place like crazy! 


I was trying to figure out some kind of substitute for the rice. Hmm...something more filling and healthier than rice. Then it hit me, cauliflower! I pretty much know what you are thinking at this point. "Cauliflower?  Weird." Just trust me. I grind it up in the food processor into rice sized pieces and then sauté it in a little olive oil and spices until just cooked through.  


Don't expect the same texture as rice, I can't work miracles here. Do expect to be full and satisfied. 


Thai basil on the left, Italian on the right

You will have to get some exotic ingredients for this one. The good news is that whatever you don't use stores very well in the fridge, so you can use it over and over again. You can find these in the ethnic section of most major supermarkets. These ingredients are essential for Thai cooking, so go for it and don't try to substitute. 


*Thai fish sauce-Thai condiment made from fermented fish. Sounds yummy, right?! It really is, in moderation. It is very pungent, so measure carefully in your recipe. 
*Coconut milk-Get the full fat, good stuff!  If the label on the can is not printed in English, even better! 
*Curry paste-I used green because it is a little more spicy, but you can use red as well. Curry paste is a blend of spices like lemongrass, garlic, green chili, and kaffir lime. (All really familiar Thai flavors)
*Thai basil-A little bit more pungent than Italian basil. Has a mild licorice flavor.  I got mine in a bag at the farmer's market. You can substitute regular basil if you can't find Thai. What I do is buy the Thai basil and store it in the freezer. That way when I need to use some, I just pop a few leaves off and it is fresh and ready to go. 
*Ginger-Spicy, fragrant, delicious. Again, buy it, peel it, and store it in the freezer. When you need to use it, just defrost for a few minutes and cut off however much your recipe calls for. 


Paleo green thai pork curry with "rice"
For the curry:
1 13.5 to 14 oz. can of full fat coconut milk
4 tablespoons green curry paste
2 garlic cloves, finely chopped
3/4 cup lower sodium chicken broth
1 packet truvia
1 teaspoon fish sauce
3 1/3 thick slices of fresh ginger
1 lb. pork tenderloin, chopped into 1/4 inch thick size slices
3/4 cup diced red bell pepper
3/4 cup sliced carrots (sliced 1/8 inch thick on an angle)
3/4 cup sliced onions (sliced 1/8 inch thick)
3/4 cup halved snow peas
3/4 to 1 cup loosely packed Thai or Italian basil leaves, more for garnish
Optional garnishes: lime wedges, Thai chili slices, avocado slices

For the "rice":
1 head cauliflower, ground in food processor into rice sized pieces, or chopped by hand
1 teaspoon salt
1/2 teaspoon ground pepper
1/2 teaspoon garlic powder
1/2 teaspoon onion powder
2 tablespoons olive oil or coconut oil

Serves 4

"Rice"

Start by making the curry. Chop your veggies, garlic and ginger. Set aside in large bowl. Prep the pork by removing the silver skin. The silver skin is that piece of grey, silver colored tissue at the top of the loin. You need to remove it because it is tough and never really softens up during cooking. Just put the tip of your knife underneath it, press the knife forward to take it off.  Chop your pork into medallions, about the same size as your veggies. 


Take your coconut milk out of the can, place it in a bowl and whisk it to combine. The fat often solidifies at the top, don't freak out about this. 

Place a skillet over medium heat and add 1/2 cup of your coconut milk. Stir it occasionally until it has reduced down by about half, about 3-5 minutes. It will get very shiny and may or may not separate. Again, this is fine! :)

Add the curry paste and whisk it in to combine. Add the fish sauce, truvia, chicken broth, and the remaining coconut milk. Bring to a simmer.

Add the vegetables, garlic and ginger and cook for about 2 minutes. Add the pork and continue to cook until the pork is just cooked through. The vegetables should be softened by now, but you still want them to retain their "bite." This is why you need to chop your veggies relatively thin. This is not a very long cook time.

Once the curry has cooked, remove the ginger. It has fulfilled it's "flavor destiny," plus you don't want to bite into a big piece of spicy ginger! Set curry aside.

For the "rice", cut your cauliflower into florets and place into a food processor. I had to do this in 2 batches. If you are hand chopping, that is fine. It is more time consuming to hand chop, but the results will be the same. Pulse the cauliflower until it is in rice sized pieces. Season with salt, pepper, garlic and onion powder.  Sauté in coconut or olive oil over medium high heat until just softened, around 5 minutes. Taste for seasoning. 

Pour curry over cauliflower "rice," garnish with more Thai basil, thai chili slices, lime wedges, or avocado.


Let me know what you think!  I think this one is a keeper. 


Sunday, May 8, 2011

Spice rubbed flank steak

Hi friends!

Let's talk about the flank steak for a second, the red-headed step child of the beef world. Everyone always goes for the big cuts--the new york strip, the filet, etc. Well, we aren't going there today. Nope, sorry. Let's expand our horizons.

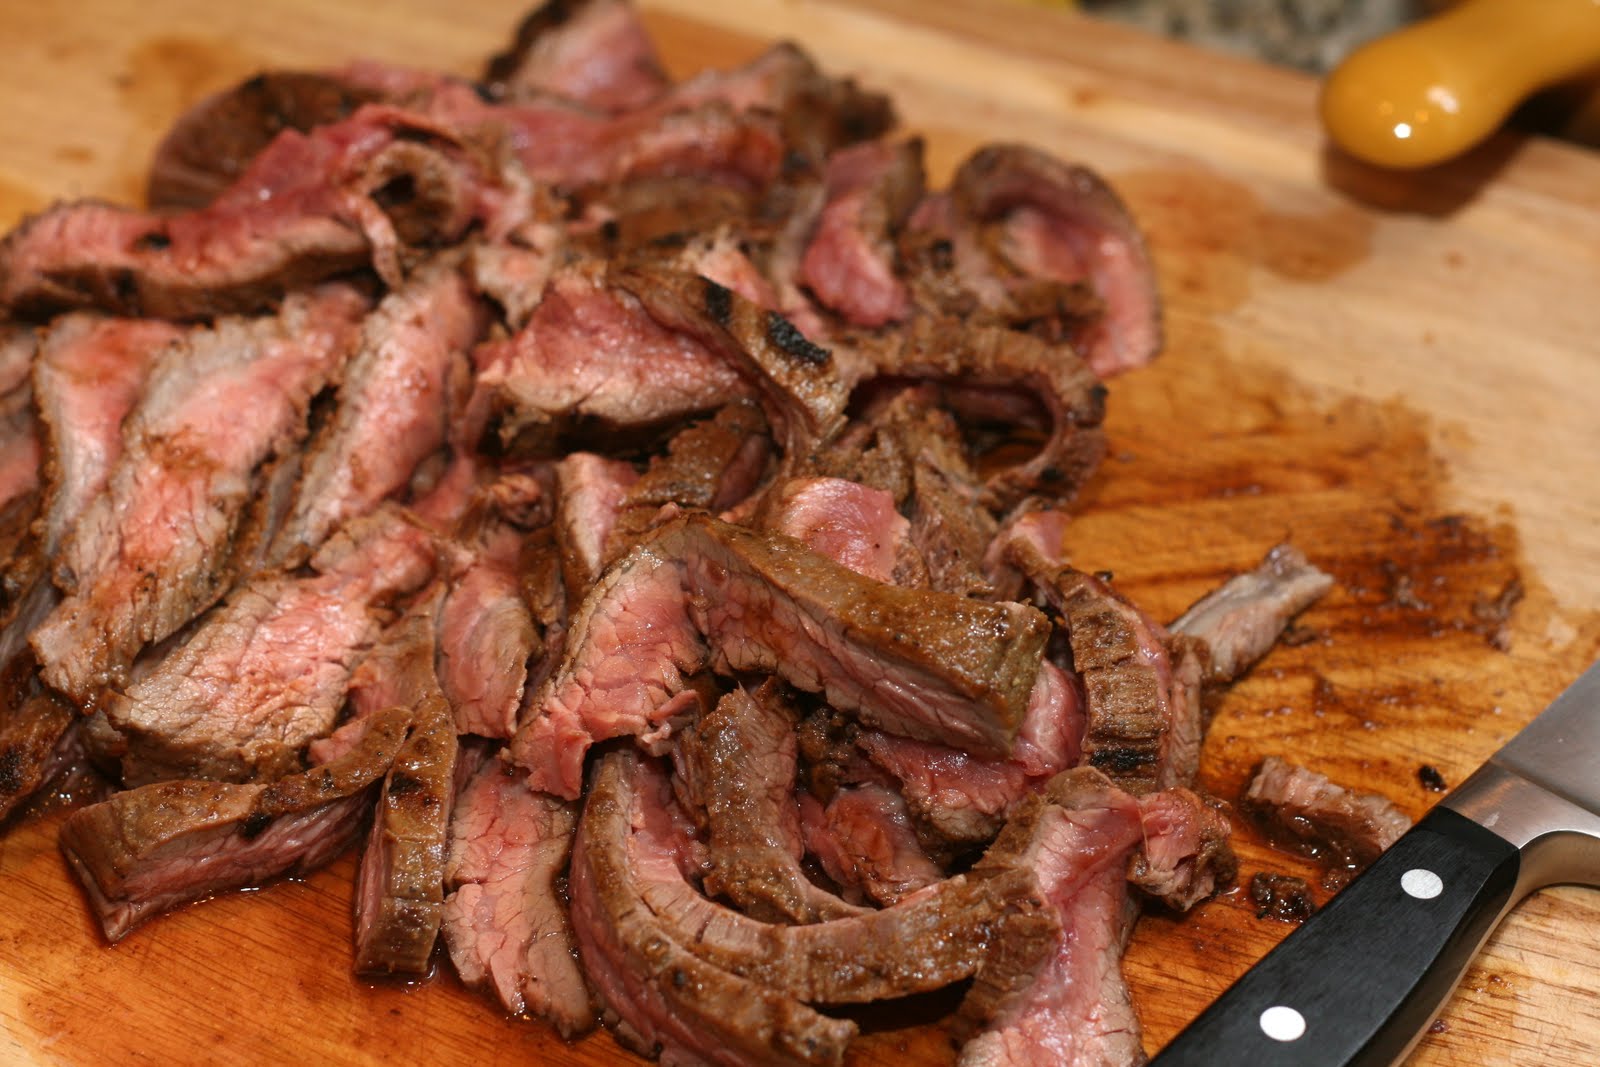
Mmmmm steak! 

This is a cut from the abdominal muscles of the cow. It can be tough if cut into big strips, but when you cook it properly and slice it thin, it turns out juicy and delicious. I buy one of these at least every couple of weeks because it is so affordable. You get a large piece, cook it and keep it in the fridge for salads all week long. This recipe is also awesome because of the spice rub. I use a mixture of different kinds of spices, you can add or substitute your own if you'd like.  Also, feel free to double or triple the rub because it is good on any meat and it can be stored for a long time in a sealed container. Let's talk about some of the spices you may or may not be familiar with:

*Ground coriander-these are the seeds of the Coriandrum sativum plant, an herb. You are probably familiar with the leaves of this plant, AKA cilantro. I personally have a special kind of hatred for cilantro, it tastes like soap to me. BUT...I love coriander. It has a bright, almost citrusey undertone. 
*Ground cumin-another herb seed. You probably know this one too. It is that smoky, rich flavor you taste when you eat a good chili. 
*Paprika-ground chili. Ranges in flavor from mild to hot. I buy the mild kind. Just look for plain paprika at the store, not the hot or the sweet kind (unless you want more spice to your steak.) 


Grass fed beef flank steak from your friendly farmer's market

Spice rubbed flank steak
One 2 lb flank steak
1 tablespoon salt (not kosher)
2 teaspoons ground black pepper
2 teaspoons ground coriander
1 teaspoon ground cumin
2 teaspoons garlic powder
2 teaspoons onion powder
1 teaspoon paprika
Extra virgin olive oil

Serves 6-8 

*Cooks note: directions included are to prepare steak for medium to medium rare throughout. I don't recommend cooking this type of cut to well or medium well. 

Take your steak out of the fridge and let sit at room temperature for about 20-30 minutes. This helps to ensure that the steak cooks evenly throughout. Plus you don't want a very cold piece of meat hitting a hot pan.  Preheat your grill pan to high heat. You want your pan to be smoking, "call the fire department" hot for when that steak hits it. :)  Measure out your spices and stir to combine them. Rub the spice mixture all over the steak on both sides. Don't be shy--rub it in all the crevices and make sure it is well coated. 


Drizzle your grill pan with a little bit of olive oil. Put your steak onto the screaming hot grill pan and let it sit for exactly 5 minutes. Don't touch it, turn it, or mess with it! You will mess up your pretty grill marks if you keep moving it. We wouldn't want that. After exactly 5 minutes, flip onto the other side and cook for another 5 minutes. If you are cooking this on an outdoor grill, skip the olive oil. Just make sure your grill is clean. Use the same cooking times, just make sure you are using the hottest part of the grill.


Remove from the heat and place it onto a cutting board. Don't cut it for at least 15 minutes! (Longer if you can wait!) I can't stress this enough. This principle applies to all meat. Once it is cooked, let the meat rest so the juices can redistribute. This ensures that once you cut into it, the meat won't bleed all over your cutting board. Cutting it too soon results in a dry, hockey puck piece of meat. 

Once your meat has rested, take a sharp knife and cut the steak very thin and against the grain. Make long, thin strips. 


Dan and I snack on this all week, but my favorite way to eat it is piled up on a salad with avocado, tomato and some roasted pecans for crunch. Top it with a balsamic vinaigrette and you have a very fast, healthy and satisfying dinner. Enjoy!


Thursday, April 28, 2011

Asparagus, mushroom and pancetta frittata

Dan and I had some spare time before meeting some friends for dinner so we decided to wander into Star Provisions. http://www.starprovisions.com/  This place is like a foodie's dream. Look at this ridiculous asparagus we got! 


We usually just roast it and eat it plain, but I wanted to play around with it a little bit. Hmm...frittata! A frittata is an egg dish, similar to an omelet, but it is left round and finished in the oven.  None of that silly "folding over" nonsense. I decided to pair it with a little pancetta. Pancetta is like Italy's answer to bacon. It's cured with salt and spices, totally wonderful. Think bacon minus the smoky flavor. You can buy it in most markets now, in the specialty meat section. Some markets slice it in a thick slab, like the pancetta I bought from Whole Foods. You can also buy it presliced in packages. If you have problems finding it, feel free to substitute bacon. It will be just as good.


Asparagus, mushroom and pancetta frittata
6 whole eggs
6 egg whites
1 teaspoon heavy cream or half and half
4 oz pancetta or bacon
1 lb. asparagus
1 cup sliced mushrooms (I used cremini) 
2 small yellow onions, or one medium onion, chopped
2 garlic cloves, finely chopped
Salt and pepper
Cooking oil (I used coconut. Olive oil would work well too)
Optional-parmesan reggiano for topping

Serves 4

Preheat the oven to 375 degrees. Hold the asparagus in the middle of the stalk. Grab the end and snap off 
the tough, fibrous end. This is your guide of where to cut for the rest--line them up evenly and cut off the end on all of the stalks. Discard the chopped off portion. 

Drizzle the asparagus in your oil of choice, salt and pepper. Place in the oven and cook until tender, but still crisp. You want the stalk to still be able to stand up when you hold them out horizontally. For my thick stalks, this took 15 minutes.  Once roasted, set aside to cool. Change the oven temperature to broil.

Roasted asparagus


Preheat a large skillet on medium with one tablespoon cooking oil. Chop the onion and garlic, add to the pan with salt and pepper. Sauté until the onions are translucent. This is called "sweating" the onion. Very appetizing name, right? While the onion and garlic are sweating, chop your pancetta into bite sized pieces and set aside.


Once the onion is cooked, remove from the pan and set aside. Cook the pancetta in the same pan on medium heat until the fat has rendered off and it has turned into brown "flavor nuggets." AKA cook until it is crisped up...you know, like bacon. Remove from pan with a slotted spoon and place on paper towel to drain. Reserve the fat in the pan!  You will have some caramelized spots on your pan, do not remove them! This is a big ticket flavor item! :) 


Place your chopped mushrooms into the pan with the pancetta fat. Season with salt and pepper. 

While the mushrooms are cooking, chop your asparagus into bite sized pieces. Prep the egg mixture by cracking 6 whole eggs and 6 egg whites, and the heavy cream or half and half into a bowl.  You can save the yolks for a custard! If you'd like, you can use all whole eggs. It will taste even better. Season the eggs with salt and pepper and whisk together to combine. I used 1 teaspoon of salt and 1/2 teaspoon of pepper for the egg mixture. (I would normally use more, but the pancetta is salty as well.)


Once the mushrooms are soft and cooked down, add all the vegetables and the pancetta to the egg mixture. Stir to combine. Preheat a nonstick, oven safe pan over medium high heat. Add the egg/veggie mixture to the pan and stir with a rubber spatula for 4-5 minutes until the mixture has set on the bottom and begins to set on top. Place in the oven under the broiler for an additional 3-5 minutes, until the top has completely set. 


Once set, remove from the oven and run your spatula around the sides just in case it is sticking anywhere. Place a large plate or platter on top of the pan, and quickly flip it to transfer it onto your platter. Be careful!

Let cool for about 5 minutes and then slice into wedges for serving. Sprinkle with parmesan reggiano or parsley for garnish. 

I hope I have peaked your interest in yet another delicious pork product. Enjoy! 

Monday, April 25, 2011

Paleo "spaghetti" with meat sauce

Hi friends! Happy Spring!


I have been the worst blogger ever. Between 180 clinical hours, classes, my TA position and life in general, the time has flown by. It's finals week and my brain needed a break from all that!

In honor of my Crossfit friends (and Paleo eaters), I decided to include my recipe for Paleo "spaghetti."  The Paleo Diet is a way of life that incorporates fruits, veggies, meat, seeds/nuts, but no grain or dairy. Regardless of your food beliefs, this is a healthy way to fulfill that carb craving without going overboard on the calories. You get the lovely "spaghetti and meatballs" satisfaction that we all love, plus lean protein and vegetables. Winner!!

George, the most buff cur on the planet

Appolonia, the most spoiled cur on the planet

Raw spaghetti squash

I'm sure you have seen this curious little yellow squash in the produce department and wondered, "what am I supposed to do with that?!"  The really cool thing about it is once it is cooked, it flakes off into little strands that resemble spaghetti noodles. As a bonus, it's really easy to work with! The flavor is mild and a little sweet. It pretty much takes on the flavor of whatever sauce you decide to pair with it, so feel free to experiment with sauces. Or check this one out: http://bearhairineclair.blogspot.com/2010/11/first-recipe-oh-my.html

I had leftover sauce that I had frozen from a month ago, so I pulled that out and defrosted it. Feel free to buy a good jar of canned sauce if you'd like as well.  You won't believe how easy this recipe is.

Paleo "spaghetti" with meat sauce
One medium to large spaghetti squash
One lb ground meat of your choice (chicken, bison, beef, pork)
Red sauce-atleast 2 cups (depends on how saucy you like your dish!)
Olive oil, salt, and pepper
Basil or parsley for garnish

Serves 4

Preheat the oven to 375 degrees.  Cut your squash in half and remove the seeds with a spoon. Drizzle it with a healthy drink of olive oil, salt and pepper. Rub the olive oil, salt and pepper into the squash. Place cut side down on a sheet pan and roast at 375 degrees for 30-45 minutes, depending on how big your squash is. Check it around every 20 minutes for doneness. The cut side should be slightly caramelized and the flesh should be easily pierced with a fork in all areas. Let cool.


While your squash is cooling, season your ground meat with salt and pepper. Brown the ground meat in a large skillet and drain off the fat. Or, if you are going paleo, leave the fat! (All the tastier it will be!) Once the meat is browned, add about 1/2 cup of your sauce (just enough to keep it moist.)

Once your squash has cooled enough to be handled, grab a large spoon and start scooping out the flesh. 

See the cute little "noodles?"


Add the squash to the meat/sauce mixture. Add more sauce and stir in the squash until you have the desired sauce/squash ratio. It took my recipe about a pint of sauce. Reheat now, or when you are ready to serve. 

Top with chopped parsley or basil for extra flavor.

I hope this becomes a staple in your paleo pantry! You won't even miss the noodles. Enjoy!


Monday, February 14, 2011

Food inspiration-"Satisfied"

I miss warm weather.  Most of all, I miss warm weather food.  I was looking through one of my favorite cooking blogs, Chef Louise Mellor's "Satisfied."  Her pictures always amaze and inspire me..and make me very hungry.  This tomato tart is so gorgeous.  Doesn't it make you just crave the summer flavors?

http://www.2besatisfied.com/


Monday, February 7, 2011

Balsamic glazed bacon brussels sprouts


I was having dinner at Bocado (http://www.bocadoatlanta.com)  last weekend with my friend Andrea.  She ordered the brussel sprouts and was meticulously picking around the chunks of luscious bacon. She claims she doesn't like bacon. Philistine. I mean, to each his own. :)

Regardless, I am straying from the point. What I am trying to get at here is she asked me about how to make brussels sprouts.  She said she loves them, but has no idea how to make them.  I tried explaining it in my own words, but she had that "deer in the headlights" look. It occurred to me that a lot of people overlook these little guys because they don't know how to work with them. No fear friends, I am here to make you a brussels sprouts convert.


Balsamic glazed bacon brussels sprouts
1 (16 oz) bag of brussels sprouts
salt and pepper to taste
2 tablespoons oil of your choice*
1/2 cup chicken stock
1 teaspoon dijon mustard
1 tablespoon apple cider vinegar
1 small shallot, small dice
1 tablespoon good, aged balsamic vinegar
2 pieces bacon, diced* for topping

**Cooks note-I have tried this recipe with all kinds of fat/oil.  I have tried olive oil, coconut oil, and...GASP... bacon fat.  They are all delicious, but the bacon fat is the best (of course!) And, sigh, if you don't like bacon, leave it out.  But don't. 

To begin, take your brussels and chop off the woody part on the end.  Chop them in half. Chop your shallot and put it in a cup with your chicken stock, dijon,  and apple cider vinegar. Whisk together.


Even puppies like sprouts!

Preheat a large skillet to medium-high.  Add your 2 tablespoons of cooking oil.  When the oil is hot, (you will see it spread out and ripple a little) add your sprouts cut side down. Watch your fingers! Add salt and pepper to taste. The key to this recipe is to have all of the sprouts cut side down so you get a nice brown caramelization. Depending on the size of your pan, you may have to cook them in 2 batches. Cook them for about 4 minutes and then flip one over to check the color. You want them to have a nice browned color. Some will get more color than others. Don't stress about it.


Once they are browned, add the chicken stock mixture and stir around. (If you are cooking in 2 batches add half of the mixture, reserve half for the second batch.) Put the lid on the pan and let them steam for about 5 minutes, until they are crisp tender. Taste one for seasoning and see if it is done before removing from the heat.

Glaze with one tablespoon good balsamic vinegar.  I use this 25 year old vinegar from Williams Sonoma.  It is so delicious, I really could just drink it from the bottle! Use whatever brand you like.  Look for one that is aged for a few years.  The sweetness from the aged vinegar cuts through the saltiness and adds a beautiful glaze.


Arrange them on a pretty plate and top with the chopped bacon.

BACCCCCOOOONNN!